Create SageMaker Notebook
SageMaker notebook for ETL code development
When developing your ETL code, a SageMaker notebook (which is a managed Jupyter notebook) can be used to work with blocks of your code, enabling you to see code output and debug your code interactively.
Once you have completed your code development, you can shutdown the notebook and delete the development endpoint and then create a Glue workflow to orchestrate and schedule your various ETL jobs / pipeline.
Create a SageMaker Jupyter notebook and attach to the dev endpoint
Confirm that you are logged in as the lf-admin user and navigate back to the Glue service within the management console, and then on the left-hand side click on Dev endpoints and ensure that your development endpoint has a Provisioning Status of READY.
On the left-hand side of the Glue console, click on Notebooks (under Dev endpoints)
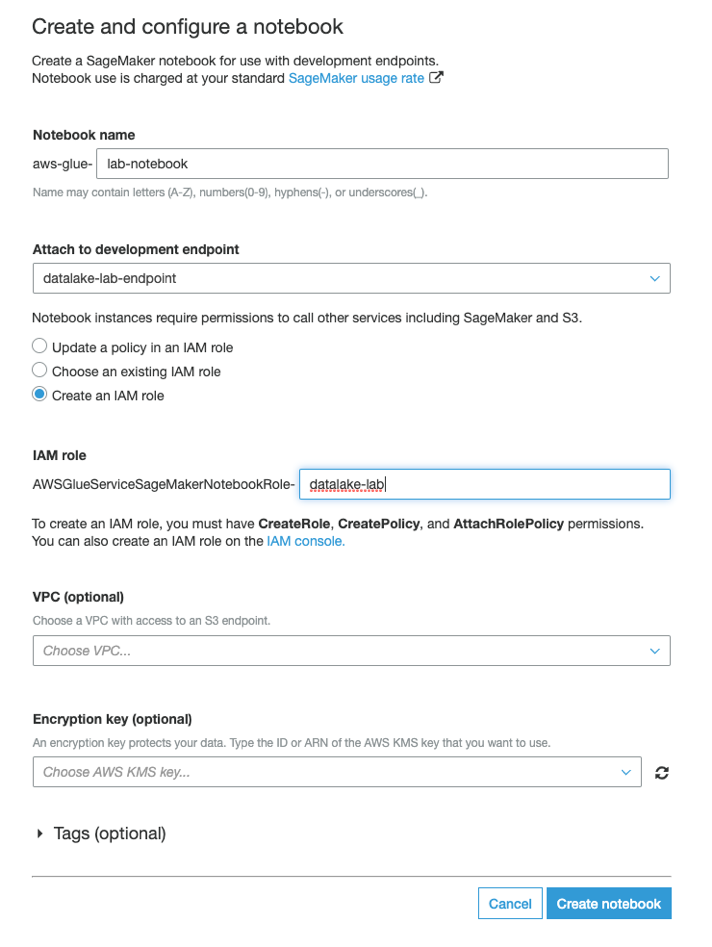
Under SageMaker notebooks click on Create notebook
For Notebook name, provide a suffix, such as
lab-notebook.For Attach to development endpoint, use the drop-down list to select the dev endpoint that you previously created (such as datalake-lab-endpoint)
Keep Create an IAM role selected, and provide a suffix for the role name, such as
datalake-lab-roleLeave all other fields as defaults and click on Create notebook.
The notebook is now being created and status will change from Starting to Ready. It will take around 5 – 10 minutes for the Notebook to be fully deployed so read through the intro of the next section while you wait for the deployment to complete.