Test the Complete Data Pipeline
Testing the Data Pipeline
In this section we are going to mimic a real life scenario where data is ingested into a data lake at a regular frequency (e.g. hourly/daily/weekly/monthly) and where we automate the full data pipeline without any human intervention.
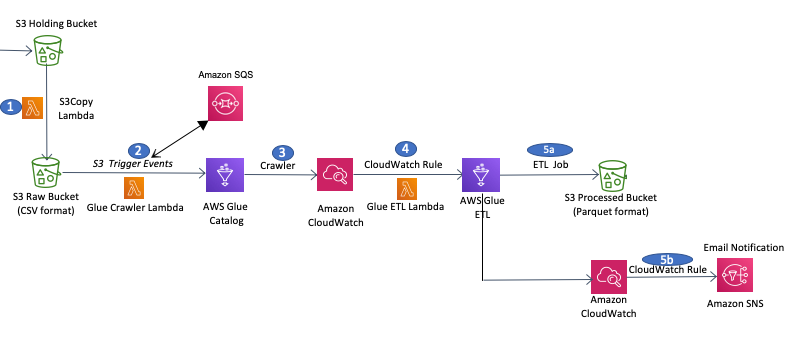
In the previous steps in this lab we completed all the required configurations, so now we can test the full data pipeline by copying the 2nd sample data file (customer-data-day2) from the S3 Holding bucket into the S3 Raw bucket. Doing this will trigger the pipeline that will run the Glue crawler, then the Glue ETL job to convert the file to Parquet format, and finally will send out a notification to us.
In the AWS Console, navigate to the Amazon S3 service, open the S3 Holding bucket folder and copy Customer-data-day2 into S3 Raw bucket - similar to what we did earlier for customer-data-day1 sample data.
Select Choose and click Copy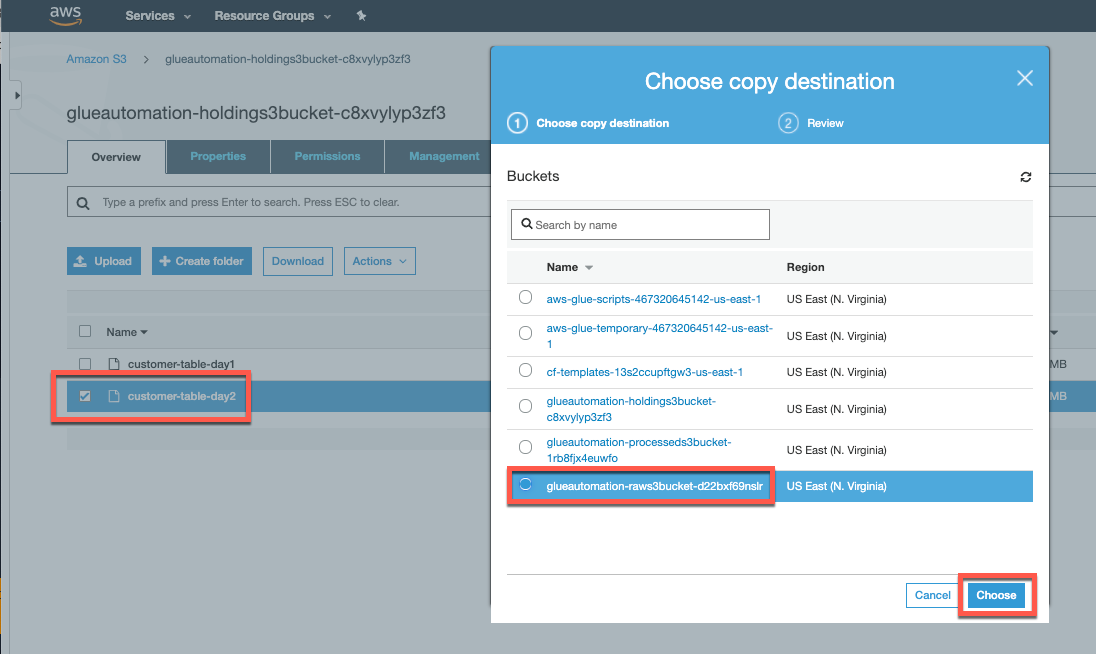
Once this file is copied over, the S3 trigger that we configured earlier will run the Lambda function that will automatically start the Glue crawler job and catalog the updated data. Navigate to the AWS Glue service and view the list of Glue Cralwers. Note that the Glue Crawler we configured has started.

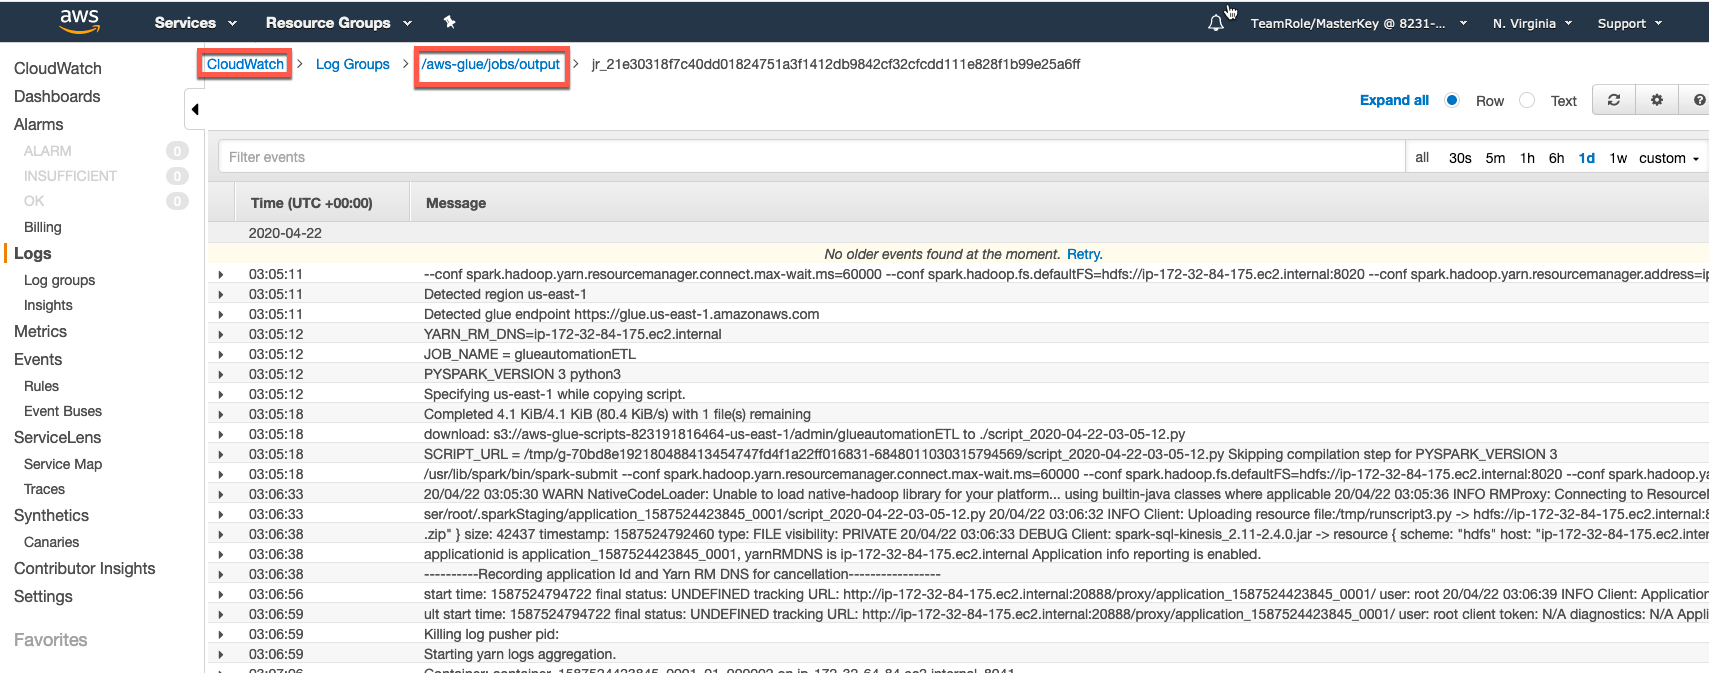
Click on Logs next to the Glue Crawler name, and this will open the CloudWatch logs console where we can monitor the crawler status. Populating the logs in Cloudwatch can take a few minutes so please be patient 😃. After a few minutes you will be able to see the status of the Glue Crawler job.
Note: AWS Glue is a fully managed ETL framework and will use an instance from its warm pool of instances to execute your job and might take some time to kick off the job. You are only charged for the job execution time and not for the time it took to provision resources.
Once the AWS Glue crawler job completes, it will report that the existing table has been updated.
Note: When the crawler job runs for the first time it creats a new table, and in subsequent runs it will update the existing table.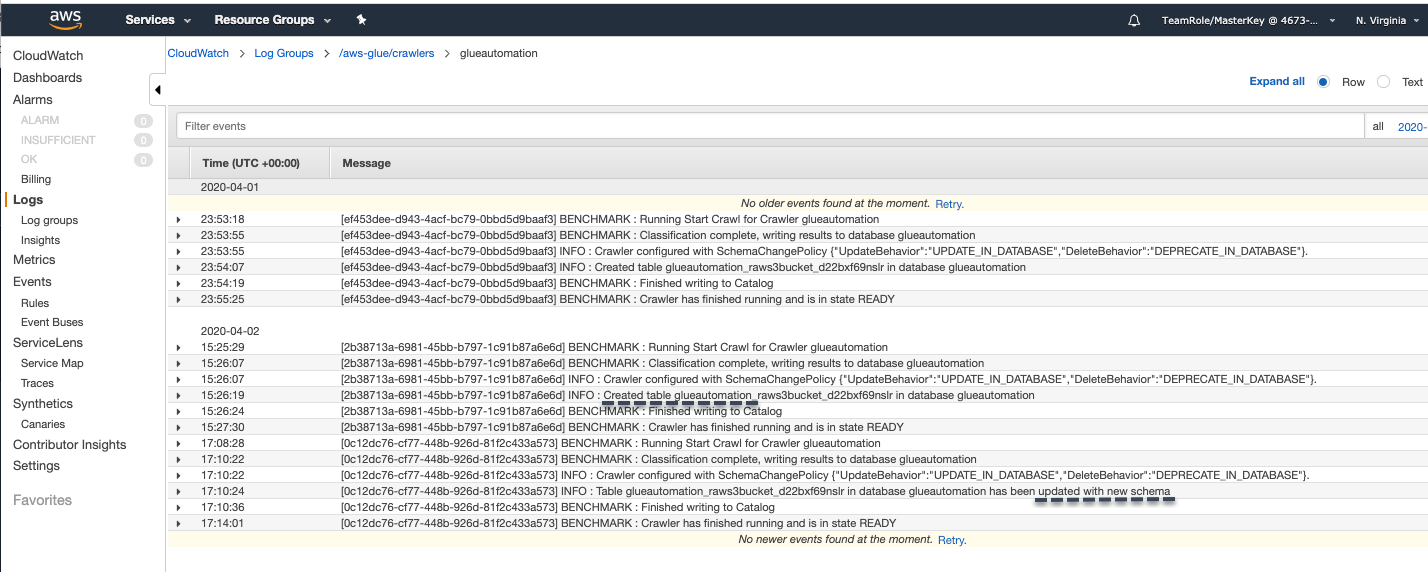
On successful completion of the Glue Crawler job, the Cloudwatch Event rule
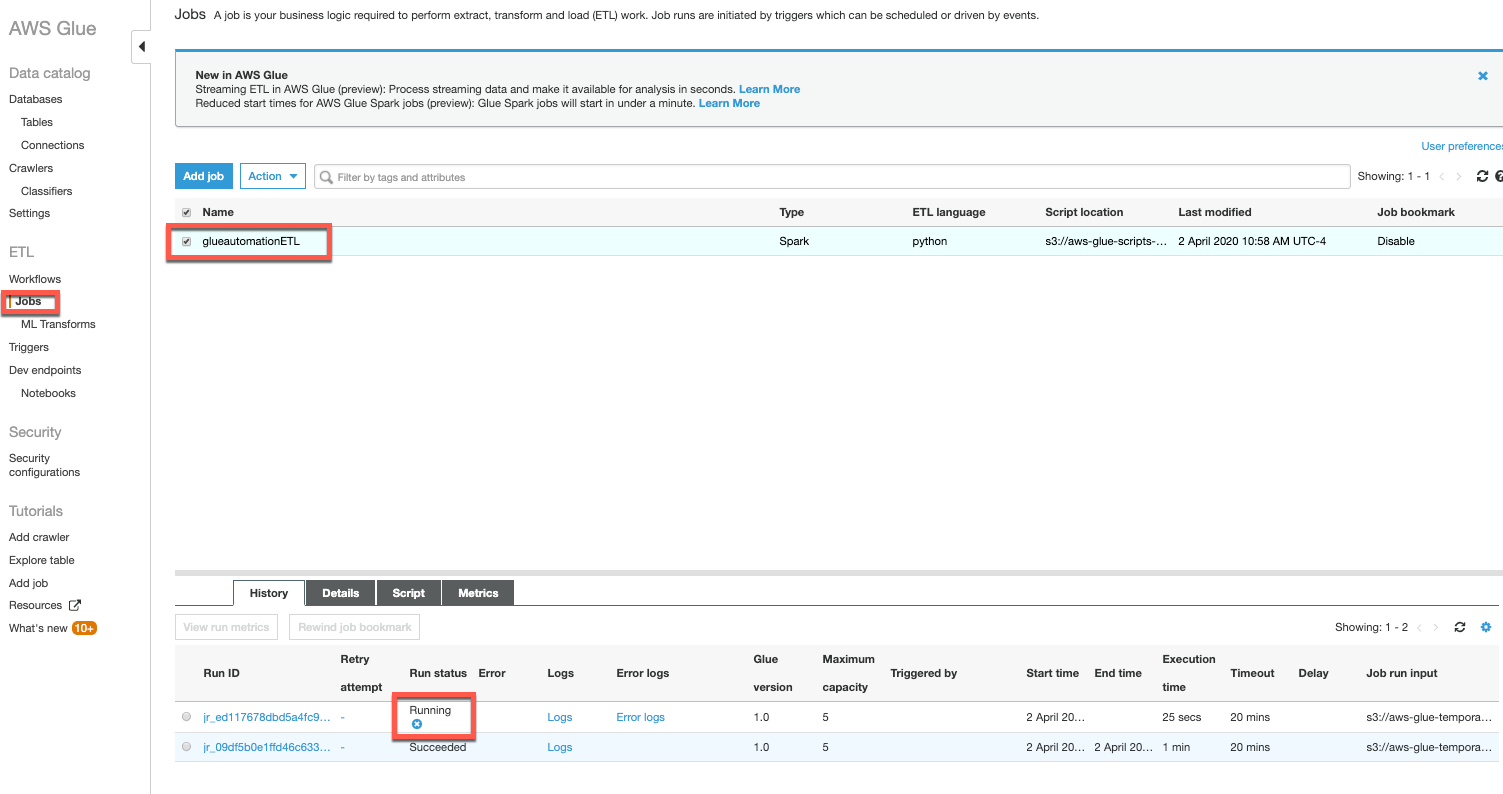
(<stackname>-CrawlerEventRule)will kick off the AWS Glue ETL job to transform the newly added data from CSV into Parquet format.To check the status of the ETL job, in the AWS Glue console navigation pane select Jobs under ETL. On selecting the ETL job, it will display the status of all job runs. You can see the latest job status as Running
Click logs to check the details of the Glue ETL job.Note: The AWS Glue ETL job will take approx. 10-15 minutes to kick off and run the job. You can have another ☕️ or perhaps a 🍹 !!
Important
AWS Glue is coming out with a new architecture that is able to start execution of ETL jobs < 1 minute. This feature is in preview and more information is available at this link.
Click on the Logs for the ETL run to check the status of the job. This will open a new window displaying the logs stored in CloudWatch. These logs can be useful for troubleshooting the failure of any ETL job.
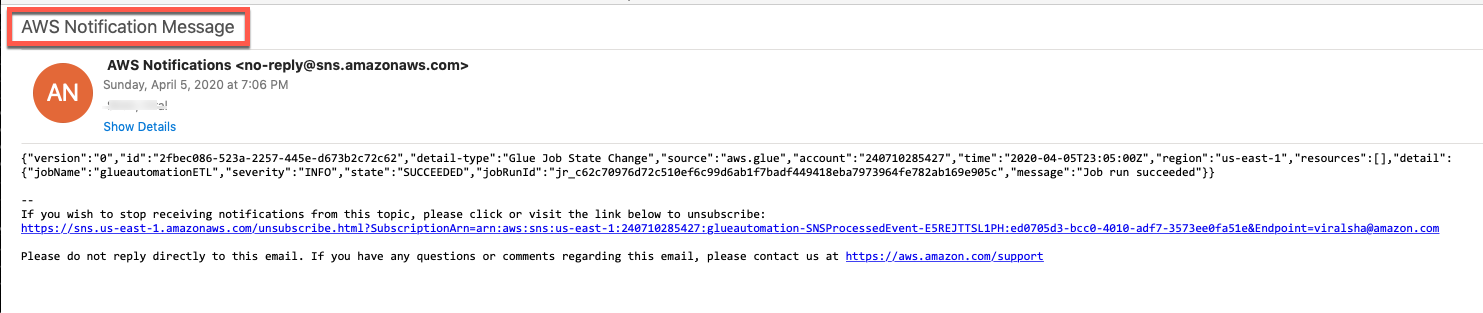
Once the Glue ETL jobs completes successfully, check the email address you specified when configuring the CloudFormation template for an AWS SNS Notification about the ETL job completion.
On successful completion of the ETL job (Run status - Succeeded), verify the S3 Processed bucket to confirm that new customer sample data has been stored there in Parquet format.
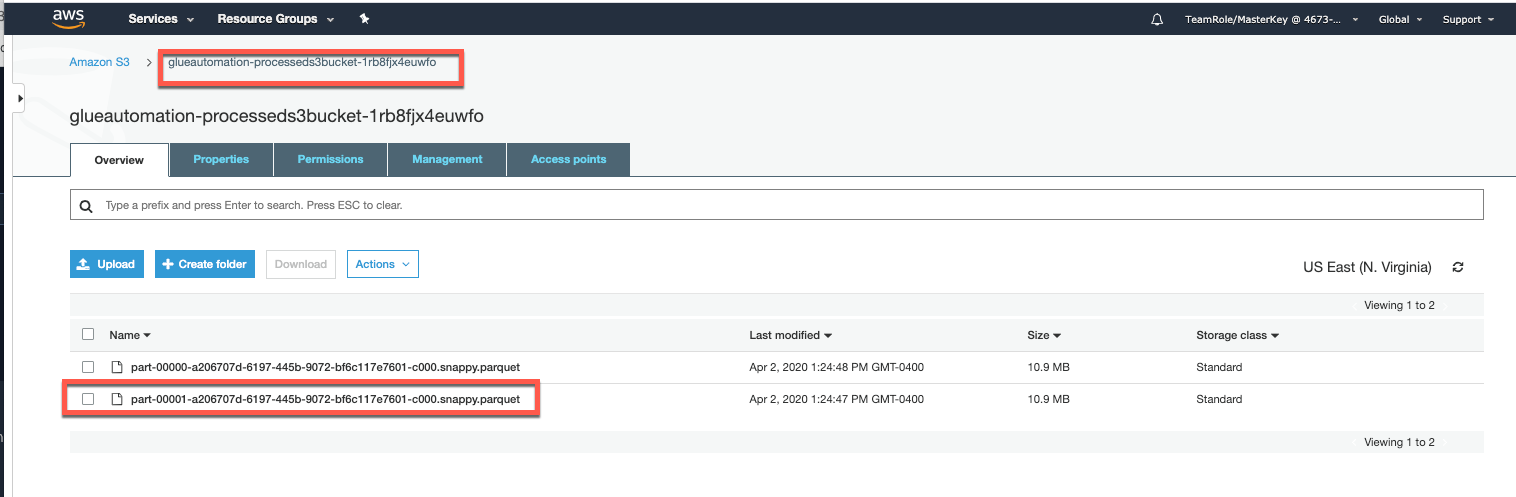
Note: Compare the sizes of sample data in CSV versus Parquet format. Do you see any size difference ??