Configure an Athena Workgroup
Athena Workgroups
Athena workgroups can be used to separate users, teams, applications, or workloads, to set limits on amount of data each query (or the entire workgroup) can scan, and to track costs. Because workgroups act as resources, you can use resource-level identity-based policies to control access to a specific workgroup. You can also view query-related metrics in Amazon CloudWatch, control costs by configuring limits on the amount of data scanned, create thresholds, and trigger actions, such as Amazon SNS, when these thresholds are breached.
Workgroups in Athena have the following characteristics:
- By default, each account has a primary workgroup and the default permissions allow all authenticated users access to this workgroup. The primary workgroup cannot be deleted.
- Each workgroup that you create shows saved queries and query history only for queries that ran in it, and not for all queries in the account. This separates your queries from other queries within an account and makes it more efficient for you to locate your own saved queries and queries in history.
- Disabling a workgroup prevents queries from running in it, until you enable it. Queries sent to a disabled workgroup fail, until you enable it again.
- You can set up workgroup-wide settings and enforce their usage by all queries that run in a workgroup. The settings include query results location in Amazon S3 and encryption configuration.
Important: When you enforce workgroup-wide settings, all queries that run in this workgroup use workgroup settings. This happens even if their client-side settings may differ from workgroup settings, and is useful for enforcing governance policies around encryption and for controlling the S3 location for where query results are written. For information, see Workgroup Settings Override Client-Side Settings
Configure an Athena Workgroup
Navigate in the AWS Management Console to the Athena service. You should still be logged in to the management console as
lf-adminClick on “Workgroup: primary” in the top menu, then click “Create workgroup”

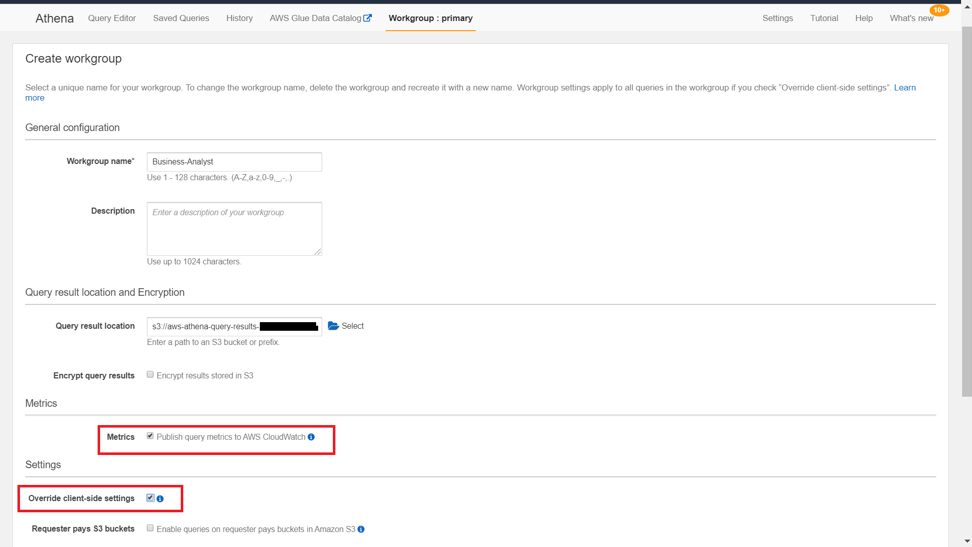
For Workgroup name, enter a unique name such as
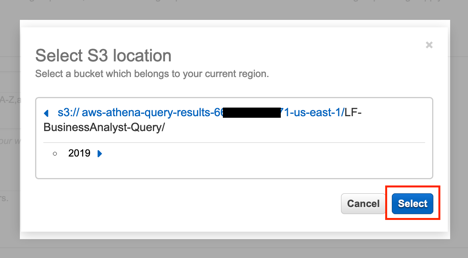
Business-AnalystFor Query result location, provide the S3 location where you want the results of queries run in this workgroup stored. Click on the blue Select button and navigate to aws-athena-query-results-… and then to the LF-BusinessAnalyst-Query and click Select. Note that this path will not exist if you did not run any Athena queries as the lf-business-analyst user in Lab 1. In that case select an alternate location.
Check the “Publish query metrics to AWS CloudWatch” and “Override client side settings” checkboxes. Then click Create workgroup. By overriding the client-side settings, we force all queries that are run in this workgroup to use the encryption and S3 query result location we have specified for the workgroup, which can be important from a compliance perspective.
You should now see your new workgroup listed- select the workgroup and click “View Details”
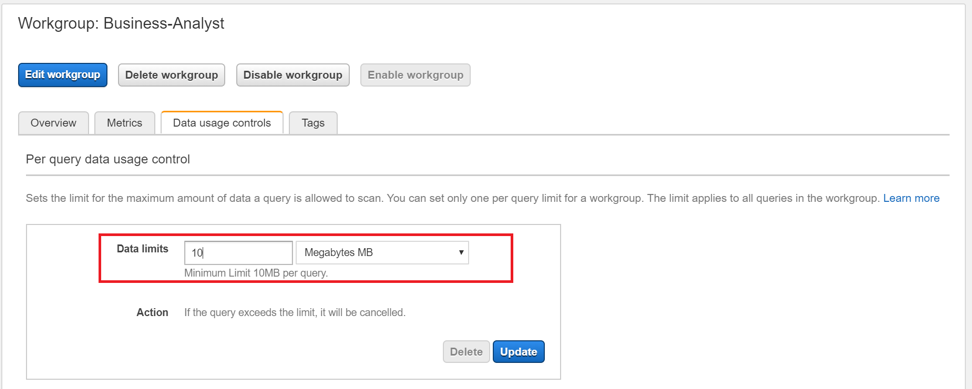
The Details tab of the new workgroup should show the values we entered earlier. Now we can click the “Data usage controls” tab and specify “Data limits” as 10 MB, which is the minimum for a workgroup. Click Update and then click Workgroup: primary along the top menu bar to go back to the workgroup summary page. This setting will cause any queries that scan more than 10mb of data to be cancelled.
As the workgroup has been created successfully, we can select it and click Switch workgroup to execute queries against it. The browser page will refresh and a summary of the override client settings (such as query result location) will display. Click Acknowledge. Note that we could edit the IAM permissions policy so that when our ‘lf-business-analyst’ user logs in they are restricted to only being able to run queries against our Business-Analyst workgroup, but due to time constraints we will not do that for this lab. For some example IAM policies for managing workgroup access see: https://docs.aws.amazon.com/athena/latest/ug/example-policies-workgroup.html
Run the following query in the new query window:
select * from dl_tpc_customer. You will notice that the query gets cancelled as the query scan data size is 22 MB and the limit defined on the workgroup is 10 MB. Click the X at the right-hand side of the Query cancelled message to close the warning box.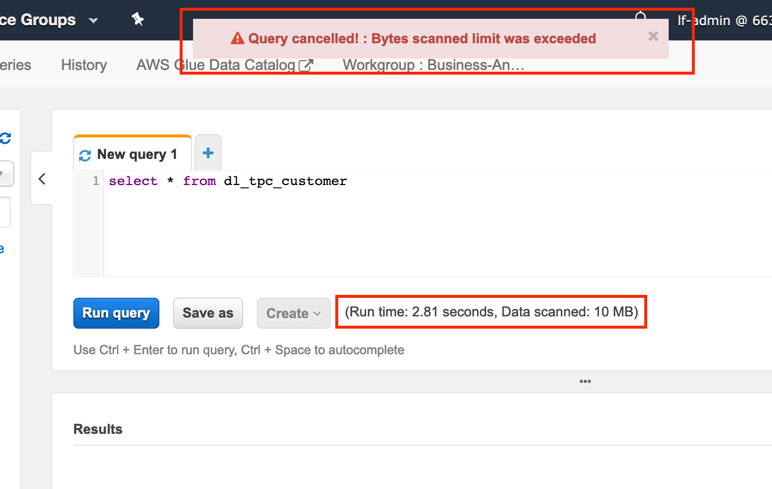
If we run the same query but select specific columns and limit the number of results, we will scan less data and the query will execute successfully. Run:
select c_salutation, c_first_name, c_last_name from dl_tpc_customer limit 10- Navigate to the Amazon S3 service within the AWS Management Console and browse the aws-athena-query-results… bucket, and then the LF-BusinessAnalyst-Query prefix. You will see that this contains a
CSVand ametadatafile that relate to the successful query you just ran in the previous step.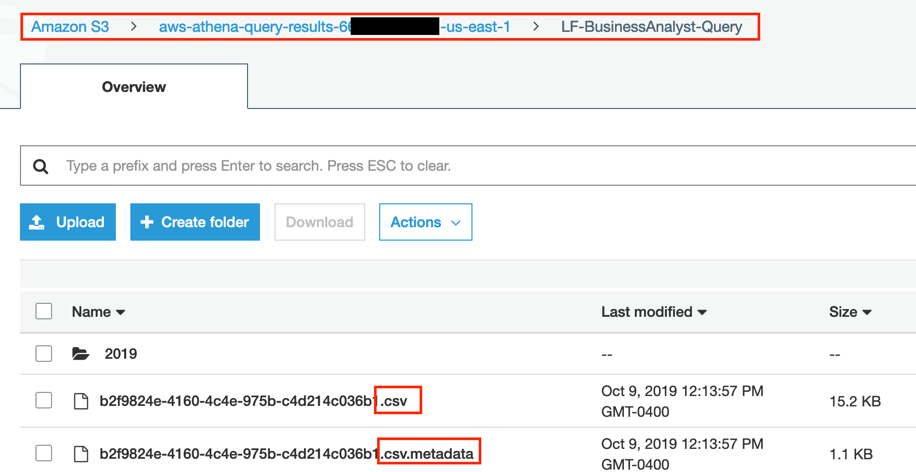
For more information about the query result files, see: https://docs.aws.amazon.com/athena/latest/ug/querying.html
- Navigate to the Amazon S3 service within the AWS Management Console and browse the aws-athena-query-results… bucket, and then the LF-BusinessAnalyst-Query prefix. You will see that this contains a