Automate Glue ETL job
Authoring AWS Glue ETL job
Once new data is successfully cataloged with AWS Glue, the next step is configure an AWS Glue ETL Job to transform the customer data from CSV format into Parquet format (columnar format).
In this section we will first configure an AWS Glue ETL job, and will then configure an AWS Lambda function to automatically kick off the ETL job after succesful completion of the AWS Glue crawler job.
- Note Accessing data in a columnar, compressed format (like Parquet) provides increased performance for your queries. Also, if using services like Amazon Athena or Amazon Redshift Spectrum to query the data lake, the Parquet format will help lower costs as pricing is based on amount of data scanned, and less data needs to be scanned for Parquet files compared to traditional file formats (such as CSV). For more information, see “5. Optimize columnar data store generation” in the following blog post: https://aws.amazon.com/blogs/big-data/top-10-performance-tuning-tips-for-amazon-athena/
Navigate to the AWS Glue console and in the left-hand panel select Jobs under ETL.
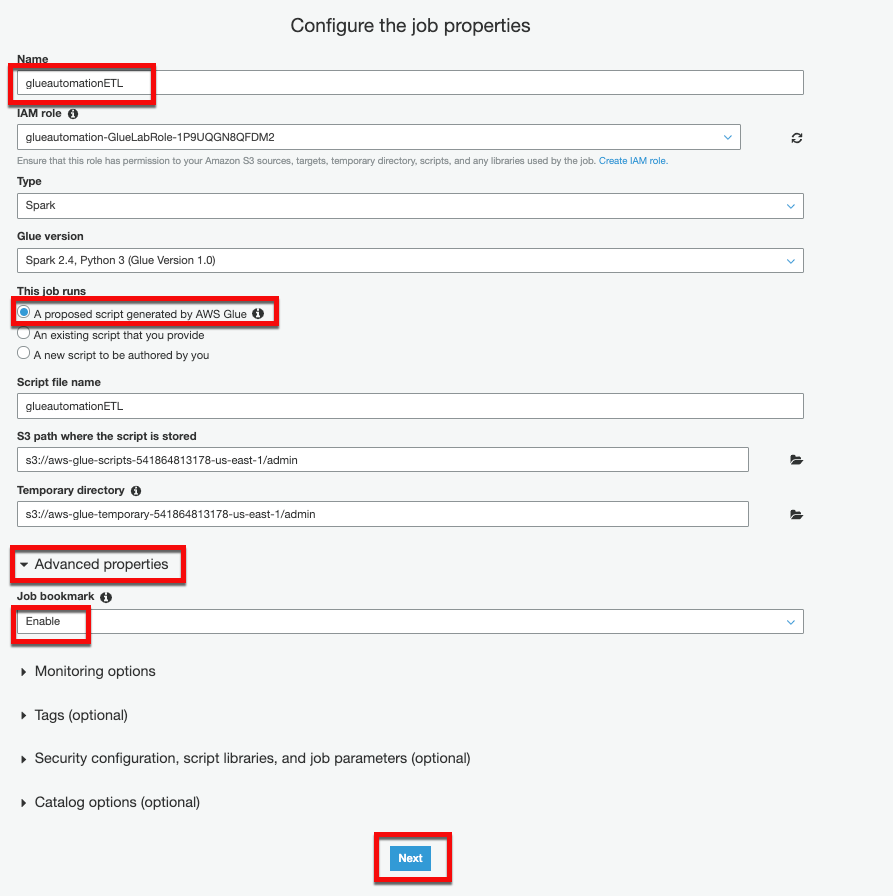
- Add Job - Provide name of your choice (e.g. glueautomationETL)
- IAM role - Select IAM role with name containing
<stackname>-GlueLabRole. Keep all other options as default.
Behind the scenes, AWS Glue uses the Apache Spark engine to execute the ETL jobs. Glue can automatically generate the ETL script for the job and provides a capability to edit/modify the script to customize transformations.
In the Advanced properties section, choose Enable in the Job bookmark list to avoid reprocessing old data. For more information on Glue job bookmarks, see: https://docs.aws.amazon.com/glue/latest/dg/monitor-continuations.html
Click Next
On the Data source page, choose S3 Raw bucket as the data source (
<stackname>-raws3bucketin it’s name), and chose Next.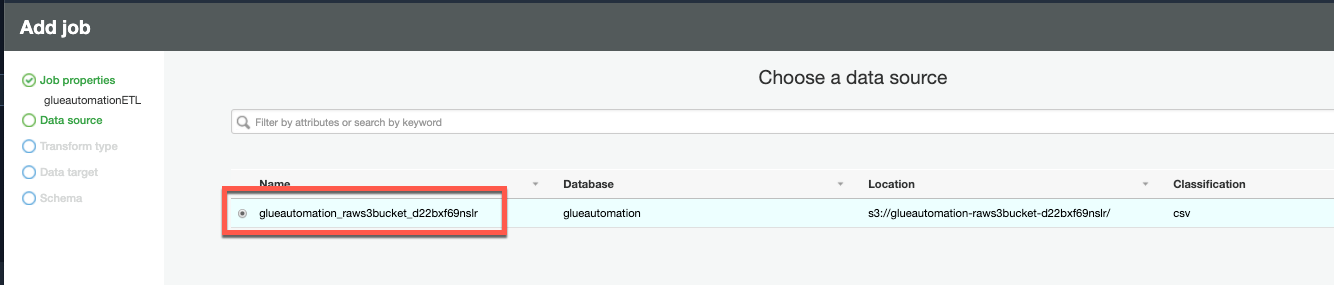
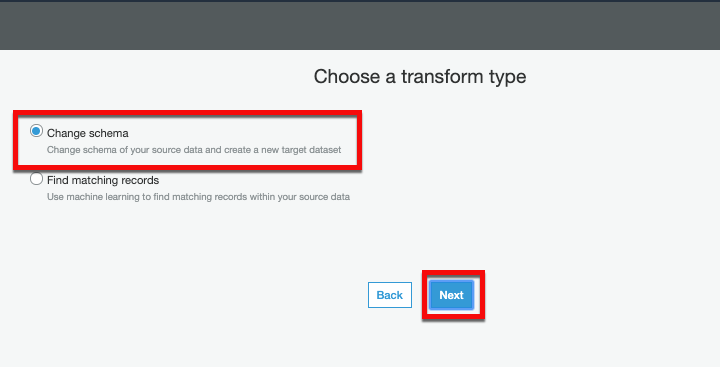
On the next page for Transform type select Change schema and select Next
On the Data target page choose:
- Option “Create tables in your data target”
- Data store - Amazon S3
- Format - Parquet
- Target path - select Processed S3 bucket as the data target path (
<stackname>-processedbucketin it’s name) and click Next.
Next screen will display Source -> Target column mappings. You can make schema changes such as changing column names, dropping columns not required or even changing data types.
Click Save job and edit scriptThe next screen will show the ETL script automatically generated by AWS Glue. You can modify the script for customization but for this workshop we are going to simply Save without any modification.
Click “X” on top right-corner to close the Glue script menu.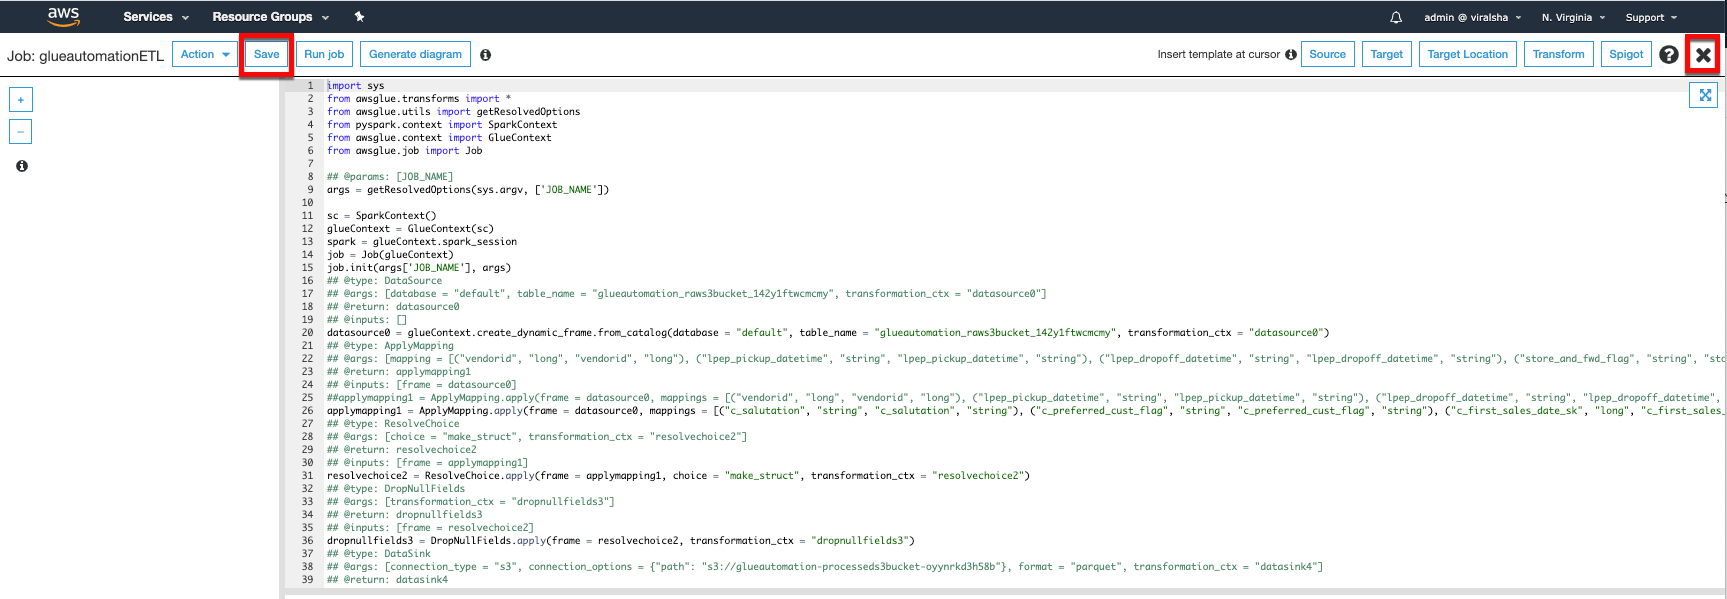
Automate ETL job execution
In this section we are going to automate the AWS Glue ETL job execution, so that whenever new data lands in S3 Raw bucket it gets cataloged first and then gets transformed into Parquet format and gets stored in the S3 Processed bucket
To automate triggering of the ETL job step, we are going to update our Lambda code and the CloudWatch Event to reference the correct ETL job name.
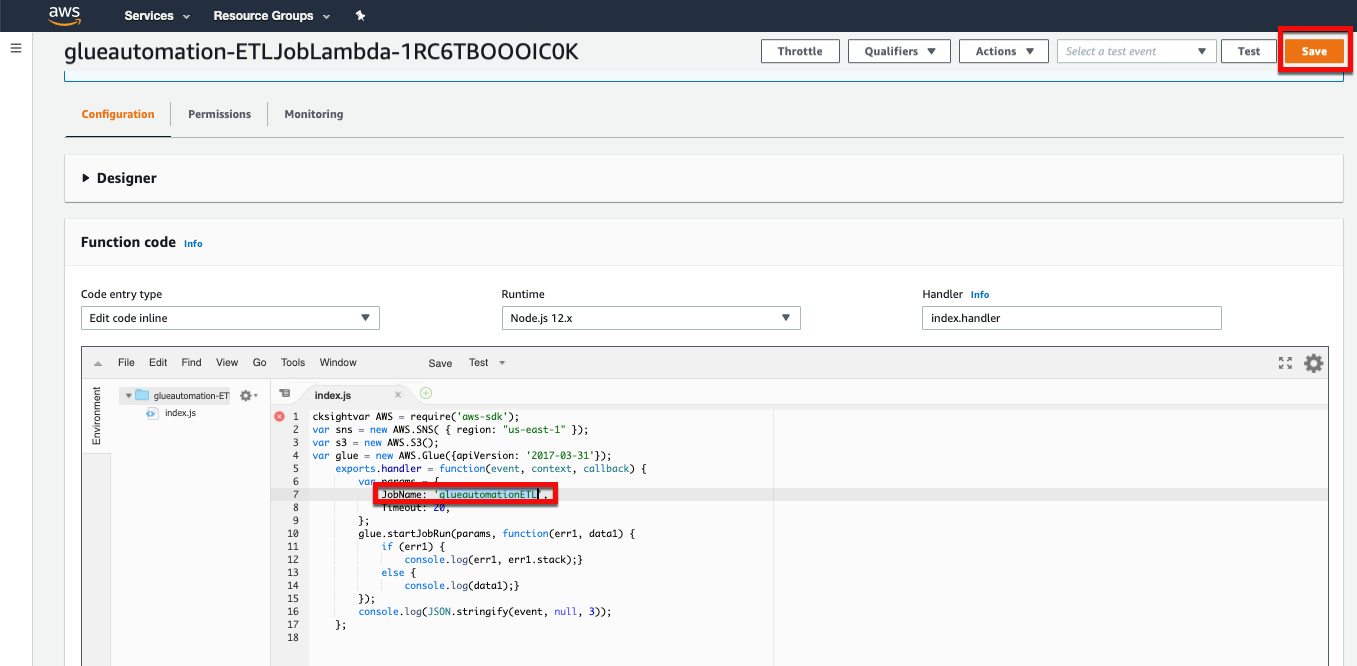
Navigate to the AWS Lambda Service in the AWS console and under Functions open the ETL Lambda function (will have
<stackname>-ETLJobLambda in it's name).Under the Function code section, update JobName with the ETL job name you created in the previous step (e.g. glueautomationETL), and then choose Save.
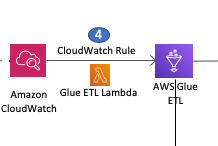
In the Lambda function you will see a CloudWatch Events/EventBridge integration which is what triggers our Lambda function (as shown in the screenshot below). When the CloudWatch Events rule receives a success status from AWS Glue crawler job, it executes the
<stackname>-ETLJobLambdaLambda function which in turns runs the AWS Glue ETL job.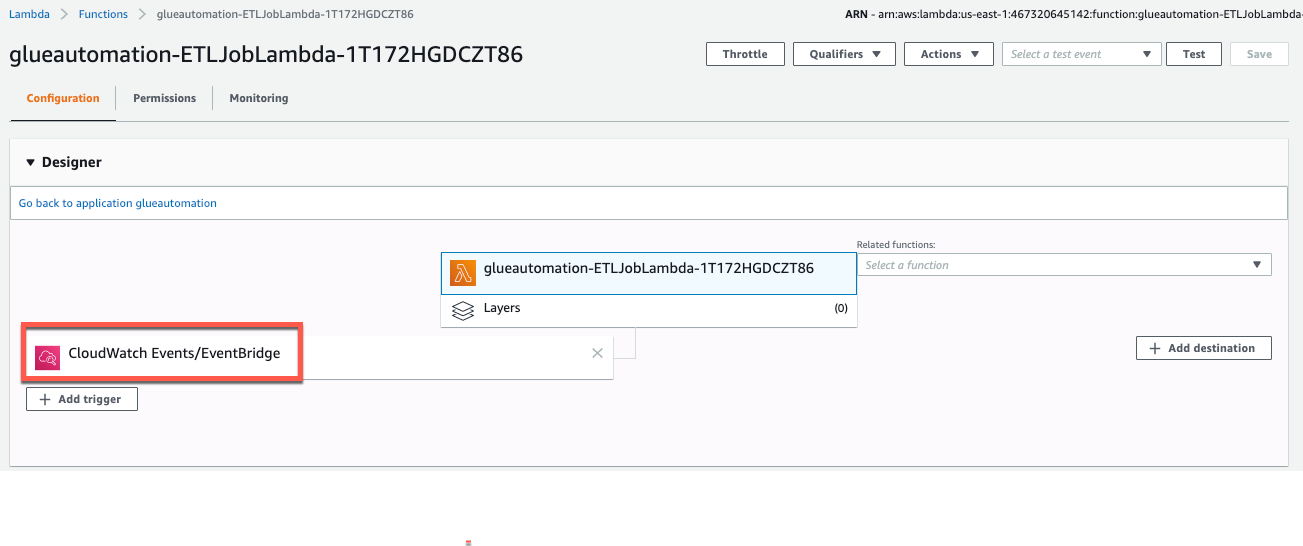
There is one last step left to complete before we test end-to-end automation. In the next section, we are going to configure CloudWatch Events to send Amazon SNS notification when the ETL job completes successfully.